Visual testing, also called visual regression testing, compares screenshots of your website before and after a change. It helps catch unintended visual issues like broken layouts, missing images, overlapping text, and styling changes before visitors see them. With no-code visual testing tools, marketing and web teams can start checking website changes in minutes without developer setup.
What Is Visual Testing?
If you’ve ever updated your website, changed a hero section, edited a CMS page, or adjusted a shared style, only to find something looked wrong later, you already understand why visual testing exists.
Here’s a common scenario: you update a campaign page and adjust the styling to match the new design. The page still loads. The links still work. But on mobile, the CTA is pushed out of view. Desktop looks fine, so the issue is easy to miss during a quick manual review.
Visual testing catches that kind of problem by comparing screenshots from before and after the change. Instead of checking every page manually, a visual testing tool highlights what changed so your team can decide what is expected and what needs fixing.
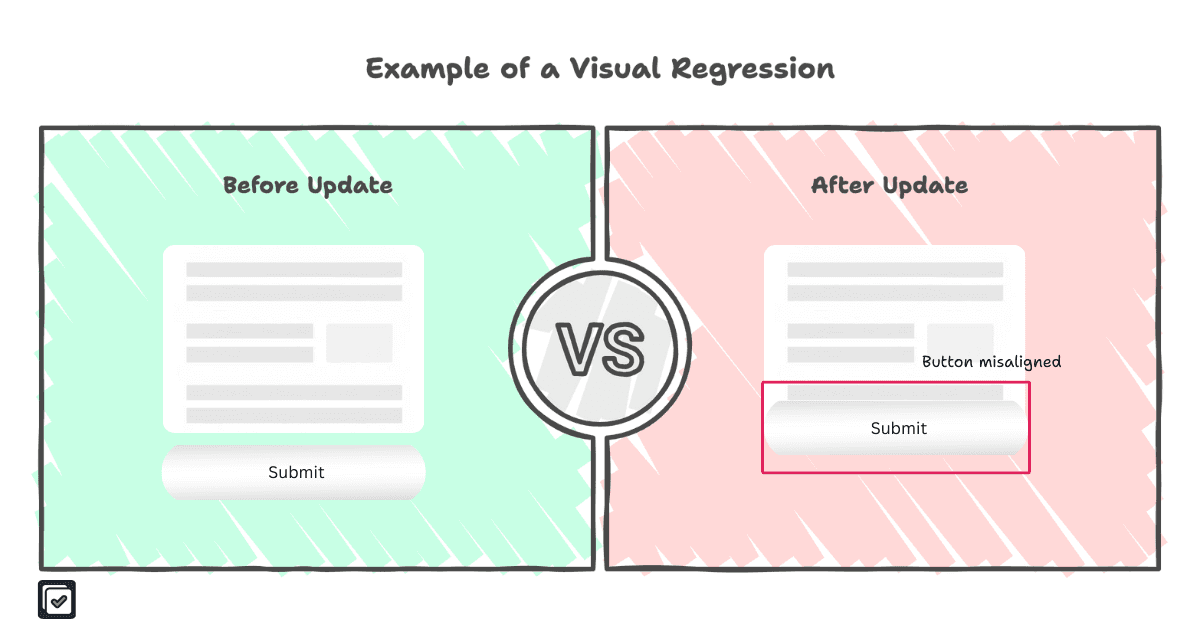
This is different from functional testing. Functional tests check whether something works: a form submits, a link opens, or a search returns results. Visual testing checks whether the page still looks right to visitors: the layout holds, content is visible, and images show up correctly.
Both are useful. They just catch different types of problems.
Why Visual Testing Matters for Marketing and Web Teams
Visual issues are easy to miss because a page can still work while looking broken to visitors. For marketing and web teams, the impact is direct: broken layouts, overlapping text, or hard-to-see call-to-action buttons can hurt conversions and weaken trust. A single issue can make a campaign landing page harder to use on mobile or turn a smooth checkout flow into an abandoned cart.
88% of online users say they are less likely to return to a site after a bad user experience.
Why manual review misses visual issues
The problem with manual review isn’t just time. It’s that teams can’t review what they don’t know changed.
A shared button style can affect 40 pages. A CMS template change can affect pages the team did not edit directly. Teams usually review the pages they touched. Those affected pages often get missed until a visitor finds the issue.
Multilingual websites make this harder. A layout that works in one language can break when translated text becomes longer, wraps onto extra lines, or pushes navigation items out of place. Teams may review the main language version and miss issues across other versions. If your site also shows different content by country or region, our geolocation testing guide explains how to check location-specific versions of your pages.
Why functional tests can miss visual issues
Functional tests check whether actions still work. They can confirm that a button is clickable, a form can be submitted, or a menu opens. But unless those tests are built to check the visual output, they do not show whether the page still looks right to visitors.
That gap is where visual issues slip through. A button can still exist and respond to clicks while being hard to see, misplaced, or pushed out of view. A page section can still load while overlapping nearby content. A third-party widget can still function while shifting the layout around it.
Visual testing gives teams a before-and-after record of what changed, so they can review affected pages before those issues reach visitors.
How to Implement Visual Testing: Four Steps
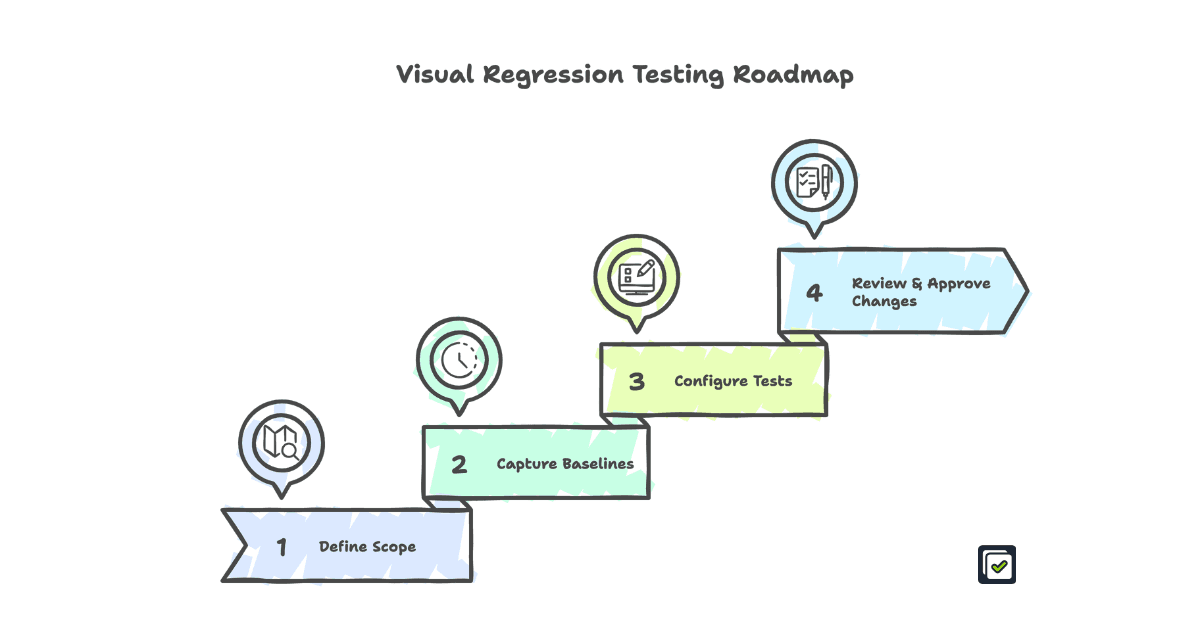
To implement visual testing, choose the pages to check, capture a baseline, decide when comparisons should run, and review flagged changes. These four steps help teams catch visual issues without relying on manual review alone.
1. Define Your Scope and Pages to Check
Start by identifying the pages where visual issues would matter most. These are the pages your team should review first after each visual check.
- Priority page selection: Focus first on high-impact pages like your homepage, pricing page, product pages, campaign landing pages, and key conversion pages. These pages directly affect trust and conversion.
- Shared templates and components: Include pages that use shared layouts, CMS templates, navigation, footers, or reusable CTAs. A small design or CMS change can affect many pages your team did not edit directly.
- Device coverage: Check desktop and mobile views based on your traffic. Most teams start with one standard desktop width and one mobile size, then add more viewports if analytics or past issues show a need.
The goal is to focus review time on high-impact pages while still catching unexpected changes across the site.
2. Capture Your Baseline Screenshots
A baseline is the approved version of your website that future checks compare against. Once your team is happy with how a page looks, capture it as the reference point. After that, every new check can show what changed.
- Capture a clean version: Create the baseline after a launch, redesign, or review pass has settled. If the site is still changing, wait until the page looks correct before treating it as the reference version.
- Use the same conditions each time: Keep browser, device size, and page settings consistent between the baseline and future checks. This reduces false alerts caused by different capture conditions.
- Account for changing sections: Exclude or ignore areas that change on every page load, like live chat widgets, rotating banners, countdown timers, personalized content, and timestamps. Otherwise, the same areas may keep appearing as changes even when nothing is broken.
3. Decide When to Run Visual Testing
Decide when your team should compare the current version of the site against the baseline, and how sensitive the comparison should be.
- When to check: Run visual testing after staging updates and before publishing to production. Some teams also run a scheduled weekly check to catch background changes, like third-party widget updates, A/B test changes, or regional content changes.
- Sensitivity settings: Start with a moderate sensitivity setting, then adjust after a few runs. If small animations create noise, loosen the threshold or exclude that region. If real issues are being missed, make the check stricter.
- Clear visual results: Choose a tool that highlights changed areas with overlays, outlines, or side-by-side comparisons. That way, you can spot problems quickly without comparing screenshots manually.
4. Review Changes and Update the Baseline
After each comparison, review the flagged differences and decide which changes are expected and which need to be fixed.
- Expected vs. unexpected changes: A planned CTA update, revised pricing section, new testimonial block, or approved layout change may be expected. A missing button, broken layout, or shifted section needs review or correction.
- Updating baselines: When a planned change is reviewed and accepted, update the baseline to the new correct version. Future checks will then compare against the updated page, not the old design.
- Clear ownership: Decide who is responsible for reviewing flagged changes after each check. The reviewer can loop in others when needed, but the review should not be left open-ended.
Visual Testing Tools: What to Look For
The right visual testing tool depends on who will run the checks and who will maintain them. A developer-led team may want full control with an open source setup or a SaaS tool connected to CI/CD. Website teams usually need something easier to start, review, and repeat without engineering support.
| Tool type | Best for | Watch out for |
|---|---|---|
| Open source or code-based tools | Developer-led teams that want full control over setup and configuration | Requires scripting, test maintenance, and engineering time |
| Developer-focused SaaS tools | Engineering or QA teams that already use CI/CD, Storybook, Playwright, or Cypress | Still usually needs developer setup and ongoing test maintenance |
| No-code visual testing tools | Marketing teams, agencies, and web teams that want to check website changes without coding | Still requires review discipline, baseline updates, and clear ownership |
| Enterprise visual testing platforms | Large organizations with compliance, SSO, procurement, or custom workflow needs | Slower setup, heavier process, and higher cost |
If you’re evaluating specific visual regression testing tools, our Sitepager vs. Percy comparison and Sitepager vs. Applitools breakdown cover the key differences for non-technical marketing teams. For a broader view, our guide to the best website testing tools compares more options side by side.
Whether your site runs on WordPress, Webflow, Framer, or another CMS, the same criteria apply: how easy it is for your team to start, review changes, update baselines, and keep the workflow going.
Keeping Visual Testing Useful Over Time
Visual testing works best when it becomes part of the website update process, not a one-time check. After the first baseline is captured, a few habits keep the workflow useful and reduce noise over time.
Keep baselines current
If baselines get stale, the same approved changes will keep appearing in every run. Keeping baselines current helps your team focus on new and unexpected changes.
Control noisy sections
Some noisy regions are less obvious than cookie notices or campaign popups. Animated hero sections, auto-rotating carousels, GIFs, A/B test variants, and personalized recommendations can show up as changes in every run. Add these areas to your exclude list once you spot them, so the review stays focused on meaningful visual changes.
Keep ownership clear
If no one is responsible for checking flagged changes, visual differences pile up and the workflow becomes harder to trust. Assign someone to review results after each check. This could be the person making the most website updates, or the person ultimately responsible for the site, such as a website manager, designer, marketer, or web team member.
Compare staging to production before every update
Before publishing, compare staging against the live site so your team can confirm what is actually changing. That way, intended updates move forward while unexpected visual or content changes are caught before they go live.
How Sitepager Simplifies Visual Testing
Visual testing can get complicated when teams have to set up pages manually, manage baselines, and review results across separate tools.
Sitepager gives marketing and web teams a simpler workflow. Enter a URL, capture a baseline, and run the same setup after website updates. Each run brings visual, link, SEO, and performance checks together in one place.
Why Sitepager works well for website teams:
- Unified checks in one run: Review visual changes, broken links, new and deleted pages, SEO gaps, and performance issues without stitching together separate tools.
- Automatic page discovery: Sitepager follows accessible links from your starting URL to find pages across your site, so teams are not limited to pages listed in a sitemap.
- Baseline comparison: The first run of a website check automatically becomes the baseline. Future runs compare against that approved version so your team can see what changed. You can update the baseline as changes are approved.
- Staging and production comparison: Compare staging and production before publishing so your team can confirm what is actually changing before it goes live.
- Controls for real-world sites: Skip changing areas like cookie banners or animated content, check password-protected pages, and run checks from 30+ locations to catch region-specific issues.
Frequently Asked Questions
What is visual regression testing?
Visual regression testing compares screenshots of a page before and after a website change to detect unexpected visual differences. It helps teams catch broken layouts, missing content, shifted elements, overlapping text, and other visual issues before visitors see them.
What is visual testing for websites?
Visual testing for websites is the process of checking whether pages still look correct after an update. It usually uses automated screenshot comparison to highlight layout, content, or styling changes that may be hard to catch with manual review.
Do I need technical skills to do visual testing?
Not with Sitepager. Your team can start from a URL, capture a baseline, and review visual changes in a web dashboard without writing scripts or setting up developer workflows.
Is visual testing worth it for marketing teams?
Yes. Visual issues like broken layouts, missing CTAs, and overlapping text can affect conversions and brand perception. Catching them before publishing helps teams avoid missed conversions, support complaints, and rushed fixes later.
How often should you run visual checks?
Run visual checks after staging updates and before publishing to production. If your website changes often, a weekly check can also help catch issues that appear between planned updates, such as third-party widgets, plugins, personalization, or location-specific content.
Can visual testing compare staging and production?
Yes. Visual testing can compare staging and production so your team can confirm what is changing before an update goes live. This helps catch unexpected differences before visitors see them.
What’s the difference between visual testing and functional testing?
Functional testing confirms behavior: forms submit, links navigate, and carts update. Visual testing confirms appearance: layouts look right, text does not overflow, and CTAs stay in view. A page can pass every functional test and still look broken to visitors.